Siding Installation A Comprehensive Guide
Siding installation sets the stage for enhancing your home’s exterior, from simple upgrades to complete transformations. This comprehensive guide delves into every facet of the process, from initial planning and material selection to the final touches and safety considerations. We’ll explore various siding types, discuss crucial installation procedures, and highlight essential safety measures.
Understanding the different types of siding materials—vinyl, wood, fiber cement, and others—is key to making an informed decision. This guide will help you navigate the choices and understand their respective benefits and drawbacks, considering your home’s specific needs and the local climate. We’ll also cover crucial pre-installation steps like accurate measurements and material preparation.
Introduction to Siding Installation
Source: vox-cdn.com
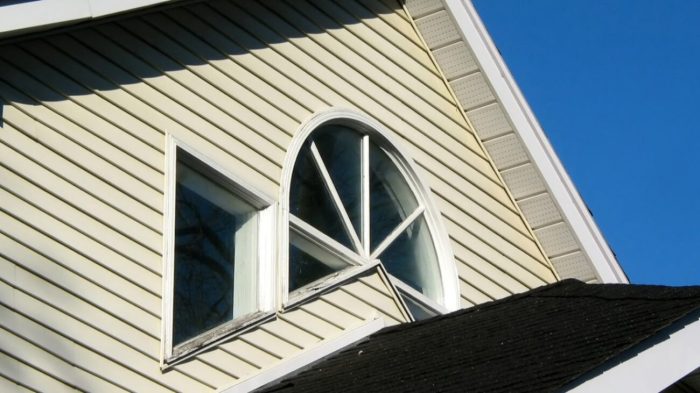
Siding installation is a crucial aspect of home improvement, significantly impacting a home’s exterior aesthetics, energy efficiency, and overall value. Properly installed siding protects the home’s structure from the elements, extending its lifespan and reducing maintenance costs in the long run. This process involves selecting the right materials, careful planning, and precise execution.
Siding materials vary considerably in their properties, each presenting unique advantages and disadvantages. Understanding these differences is key to making informed decisions about the most suitable material for a specific project. Common siding types include vinyl, wood, and fiber cement, each with its characteristics and applications.
Siding Materials
Various materials are used for exterior siding, each with its benefits and drawbacks. Choosing the right material depends on factors like budget, desired aesthetics, and the local climate.
- Vinyl Siding: Known for its affordability, durability, and low maintenance. It’s resistant to rot, insects, and moisture, making it a popular choice for homeowners seeking a long-lasting solution. Vinyl siding comes in a wide array of colors and styles, allowing for customization to match different architectural designs. However, it can be less aesthetically pleasing than wood siding and may not offer the same level of insulation.
- Wood Siding: Wood siding provides a natural, classic look that complements many architectural styles. Its warmth and texture can enhance the curb appeal of a home. However, wood siding requires more maintenance than vinyl, including regular painting or staining to prevent rot and decay. It’s also more susceptible to damage from moisture and insects, and the cost of materials can be higher than vinyl.
- Fiber Cement Siding: This material combines the durability of cement with the aesthetic appeal of wood. Fiber cement siding is highly resistant to rot, fire, and insects, and is available in various colors and textures. While it offers a long lifespan and minimal maintenance, it tends to be more expensive than vinyl and may not have the same level of flexibility in terms of design options.
Installation Steps
A typical siding installation project involves several key steps, from preparation to final finishing. Following these steps ensures a secure, durable, and aesthetically pleasing outcome.
- Site Preparation: This involves removing existing siding, cleaning the surface, and ensuring the proper framing is in place to support the new siding. Any damaged or deteriorated wood should be replaced. Ensuring a level surface is critical for a uniform and aesthetically pleasing result.
- Material Selection and Ordering: Selecting the appropriate siding materials, ensuring compatibility with the house’s architectural style and the local climate. This step includes ordering sufficient materials to complete the project, considering any waste or additional requirements.
- Installation: Installing the siding according to the manufacturer’s instructions, ensuring proper alignment, nailing, and sealing to prevent water intrusion and air leaks. Using the correct tools and techniques will ensure a high-quality and long-lasting installation.
- Finishing Touches: Applying sealant and caulking to complete the installation, ensuring proper weather protection and structural integrity. Thoroughly inspect the completed installation for any gaps, imperfections, or loose components.
Installation Flowchart
The following flowchart provides a visual representation of the basic siding installation process:
| Step | Description |
|---|---|
| 1 | Site Preparation (Removing old siding, cleaning, framing) |
| 2 | Material Selection & Ordering |
| 3 | Siding Installation (Following manufacturer instructions) |
| 4 | Finishing Touches (Sealants, caulking, inspection) |
Planning and Preparation for Siding Installation
Source: familyhandyman.com
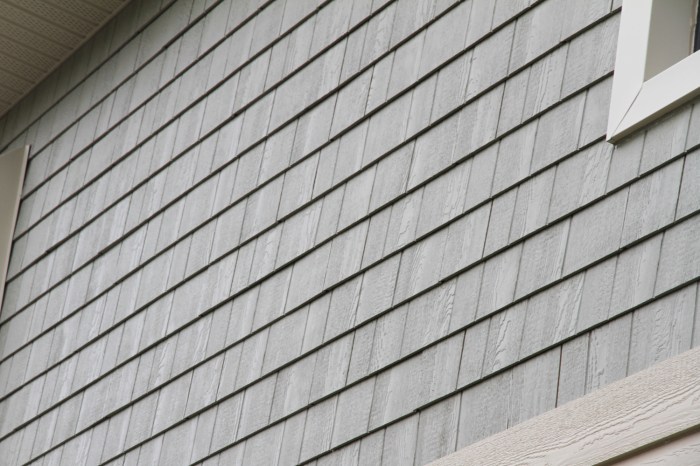
Proper planning and preparation are crucial for a successful siding installation project. This phase involves meticulous attention to detail, from accurate measurements to material selection, ensuring the job is completed efficiently and effectively. Careful consideration of these steps will significantly reduce potential problems during and after the installation.
Thorough preparation not only saves time and money in the long run but also minimizes the risk of costly mistakes. A well-defined plan ensures that the siding installation aligns with the homeowner’s vision and the structural integrity of the house. This includes considering factors like the existing house condition, the climate, and the chosen siding material.
Essential Steps in Preparing a House for Siding Installation
Careful preparation before siding installation prevents costly errors and ensures a seamless process. This involves several crucial steps, each playing a vital role in the overall success of the project.
- Thorough Inspection: A comprehensive inspection of the existing siding, framing, and exterior structure is essential. This involves identifying any damages, rot, or loose elements that need repair or replacement before proceeding. Potential issues like missing or damaged shingles, gaps in the siding, or structural flaws in the walls should be addressed before installation to prevent future problems.
- Cleaning and Repair: The existing siding must be cleaned thoroughly to remove dirt, debris, and loose paint. Any necessary repairs, such as patching holes or repairing damaged areas of the exterior structure, must be completed. This ensures a solid base for the new siding to adhere to and will prevent issues with moisture penetration.
- Removing Old Siding: If replacing existing siding, carefully remove the old siding according to local building codes and safety regulations. This step involves proper disposal of the old materials. Proper removal methods and disposal practices will help maintain safety and environmental responsibility.
Importance of Accurate Measurements and Calculations
Accurate measurements and calculations are critical for a precise and efficient siding installation. Errors in these aspects can lead to material waste, installation issues, and ultimately, a less-than-ideal final product.
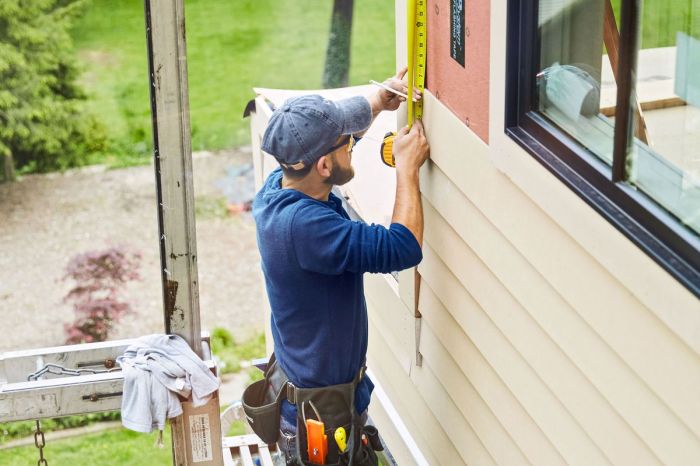
- Precise Measurements: All dimensions of the house, including window and door openings, must be accurately measured to ensure the correct amount of siding material is ordered. Using precise tools like measuring tapes and levels is critical. Consider employing a professional measuring service if required for particularly complex or large houses.
- Detailed Calculations: Calculating the total area of the house to be sided is crucial for determining the quantity of siding needed. Consider any complex shapes or architectural features that might require specialized calculations.
Choosing the Right Siding Materials
Selecting the appropriate siding material is paramount for both aesthetics and functionality. Consider factors like the home’s architectural style, the local climate, and the desired lifespan of the siding.
- Material Considerations: The choice of siding material depends on factors such as budget, desired aesthetics, and the home’s location. Different materials have varying strengths and weaknesses in terms of durability, maintenance, and cost. Consider the potential long-term costs and maintenance requirements associated with each type of siding.
- Climate Adaptation: The local climate significantly impacts the choice of siding material. Areas with high humidity or extreme temperatures may require siding with specific moisture resistance or heat-reflective properties.
Pre-Installation Checklist
A well-organized checklist ensures that all necessary steps are taken before the installation begins. This helps to prevent overlooking crucial details and maintain a smooth installation process.
- Permitting and Inspections: Obtain any necessary permits from local authorities and schedule inspections.
- Materials Ordering: Ensure that all ordered materials arrive on time and meet specifications.
- Crew Selection: Choose a reputable and experienced siding installation team.
- Site Preparation: Prepare the site by clearing debris and ensuring proper access.
Comparison of Siding Materials
The table below provides a comparison of different siding materials, highlighting their advantages and disadvantages.
| Siding Material | Pros | Cons |
|---|---|---|
| Vinyl | Low maintenance, affordable, durable | Susceptible to dents, limited aesthetic options |
| Wood | Natural beauty, excellent insulation | High maintenance, susceptible to rot and insects |
| Fiber Cement | Durable, low-maintenance, fire-resistant | Higher cost, can be heavy |
| Metal | Durable, low maintenance, long lifespan | Potential for noise, higher cost |
Tools and Materials for Siding Installation
Source: vzhanghooks.com
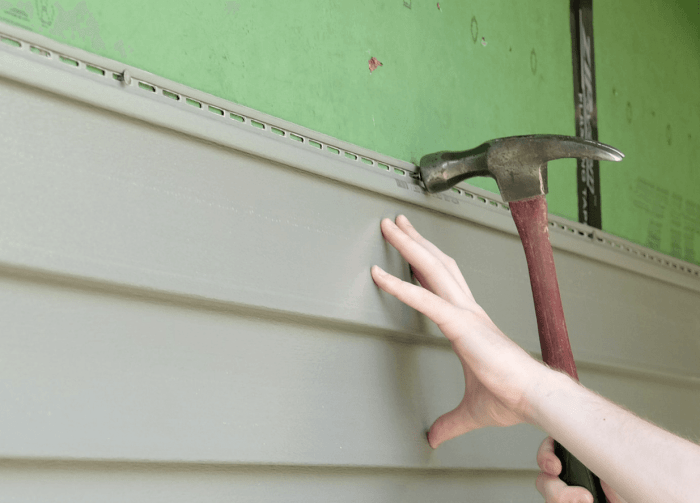
Proper tools and materials are crucial for a successful and safe siding installation project. Selecting the right equipment ensures the job is done efficiently and effectively, minimizing potential damage and maximizing the longevity of the finished product. Careful preparation of materials before installation further contributes to a smooth workflow.
Essential Tools for Siding Installation
A comprehensive set of tools is essential for a professional siding installation. This includes hand tools for precise work, power tools for efficiency, and measuring tools for accuracy.
- Measuring Tools: Measuring tapes, levels, and squares are critical for accurate measurements and ensuring straight lines. Precise measurements prevent costly errors and ensure the siding fits properly.
- Hand Tools: Hammers, screwdrivers (Phillips and flathead), utility knives, and pliers are indispensable for various tasks. These tools enable the installation of siding components with care and precision.
- Power Tools: A power drill, nail gun, and possibly a reciprocating saw are often necessary for speed and efficiency, especially for larger projects. Power tools reduce the time needed for tasks such as driving fasteners, cutting materials, and other repetitive tasks.
- Safety Equipment: Safety glasses, work gloves, and a hard hat are essential for preventing injuries. Safety equipment protects the installer from potential hazards during the installation process.
Fasteners Used in Siding Installation
The type of fastener used directly impacts the durability and longevity of the siding. Different fasteners are suited for different materials and application needs.
- Nails: Common nails are frequently used for their cost-effectiveness and simplicity. They are suitable for many types of siding, but their durability can be affected by weather conditions.
- Screws: Screws offer better holding power and are often preferred for their versatility and weather resistance. They are commonly used in applications where a strong, consistent hold is required, like with metal siding.
- Specialty Fasteners: Certain siding materials may require specialized fasteners. For example, some vinyl sidings may use specific types of screws designed for the material.
Importance of Safety Equipment in Siding Installation
Safety is paramount in any construction project. Proper safety equipment safeguards workers from potential hazards.
- Safety Glasses: Protect eyes from flying debris or accidental contact with materials during cutting, hammering, or other operations.
- Work Gloves: Protect hands from cuts, abrasions, and other potential injuries when handling materials or using tools.
- Hard Hat: Protects the head from falling objects or impact.
Preparing Materials for Installation
Proper material preparation ensures a smooth installation process. This includes inspecting, sorting, and organizing materials before starting the installation.
- Inspection: Inspect all materials for damage or defects before installation. Identifying any issues early on minimizes problems during the installation process.
- Sorting: Organize materials by type and location to facilitate quick access and prevent confusion. This helps maintain order and efficiency.
- Laying Out: Lay out materials according to the planned installation layout, ensuring all components are correctly oriented and positioned for easy assembly.
Selection Criteria for Fasteners
The selection of appropriate fasteners depends on the type of siding material and the structural requirements.
| Siding Material | Recommended Fastener | Reasoning |
|---|---|---|
| Wood | Wood screws or nails | Provides adequate holding power for wood siding. |
| Vinyl | Self-tapping screws | Ensures secure fastening without damaging the vinyl material. |
| Metal | Stainless steel screws | Resists corrosion and provides superior holding strength in harsh weather conditions. |
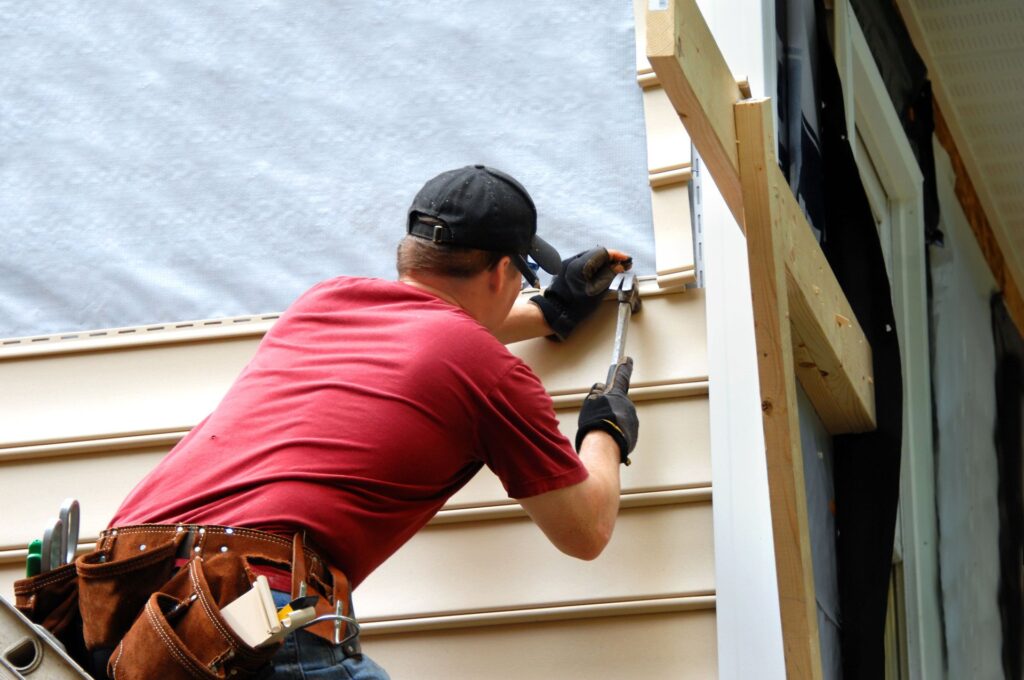
Installation Procedures for Siding

Installing siding involves a methodical approach to ensure a durable and aesthetically pleasing final product. Careful attention to detail, proper nailing techniques, and seamless transitions between sections are crucial for a long-lasting and attractive exterior. The correct procedures for each siding type are essential for optimal performance and longevity.
Proper installation procedures are paramount to achieving a strong and attractive siding job. Each type of siding necessitates specific installation methods, impacting both the structural integrity and the visual appeal of the finished project. Knowing the proper nailing techniques and securing methods is crucial to preventing issues such as cracking, warping, or premature deterioration.
Installing Different Siding Types
Various siding types, such as vinyl, wood, fiber cement, and metal, each demand specific installation methods. Understanding these differences is essential for a successful project. Different types of siding will require varying degrees of preparation and different types of fasteners. The choice of fasteners directly affects the longevity of the installation.
Nailing/Fastening Techniques
Proper nailing or fastening is critical for the structural integrity and longevity of the siding. Incorrect fastening techniques can lead to issues like gaps, movement, and eventual failure. Each siding type has specific recommendations for fastener type, size, and spacing. These guidelines are designed to prevent issues like cracking or splitting of the siding or the underlying structure. Using the correct fasteners is vital for preventing issues down the road.
Securing Siding to the House Structure
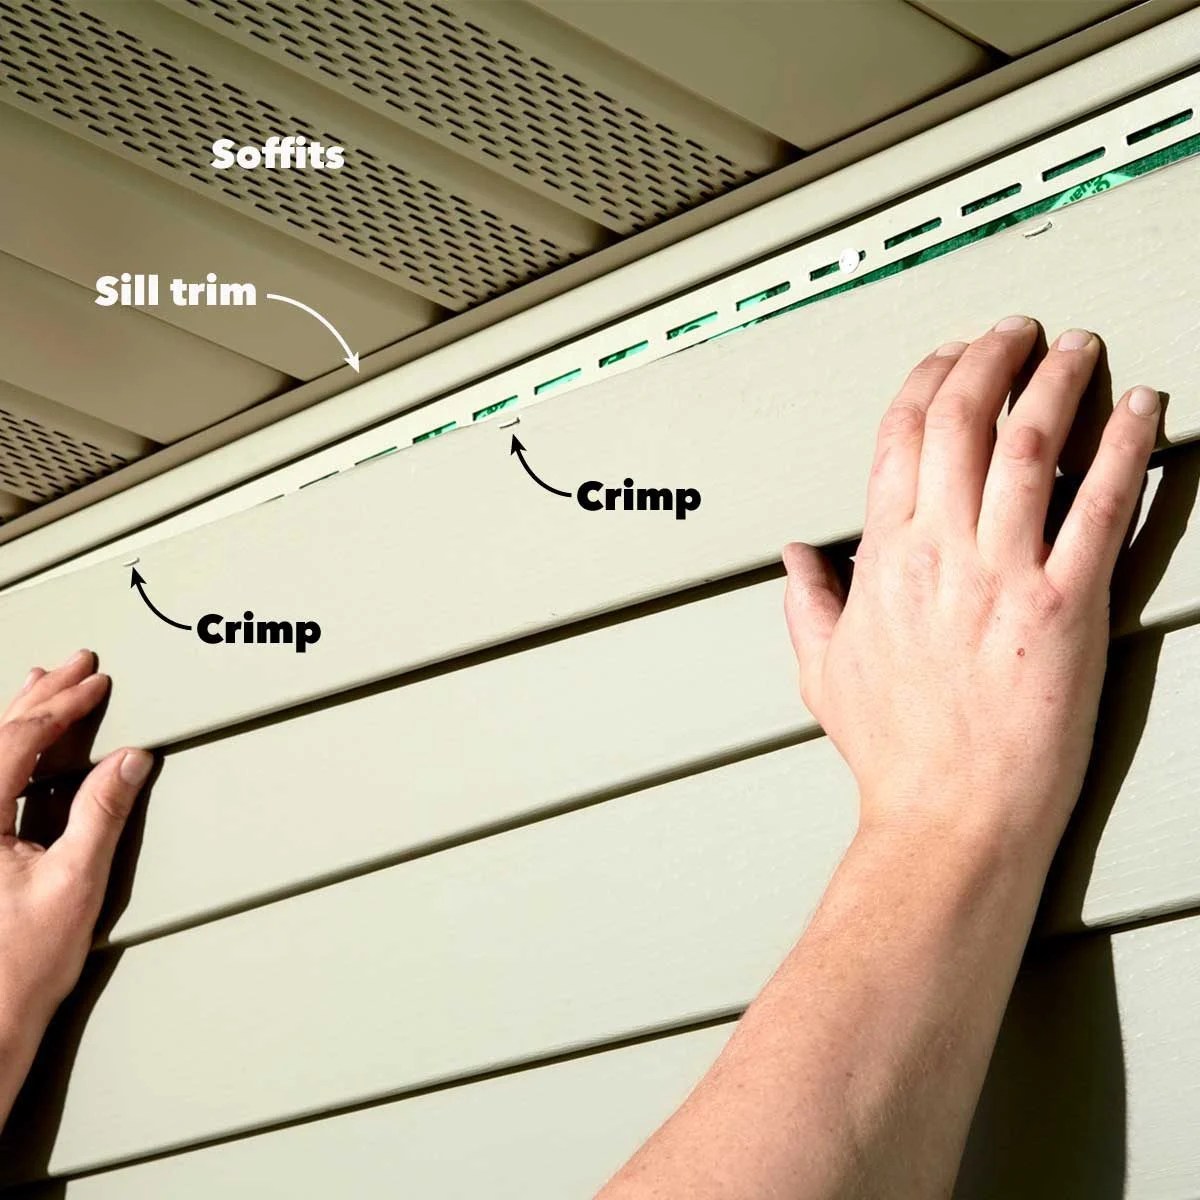
Securing siding to the house structure involves a series of steps that must be followed meticulously. A properly secured siding system not only improves the aesthetic appeal but also enhances the structural integrity of the home. This involves ensuring a tight and even fit for every piece of siding.
Specific Procedures for Installing Different Siding Types
| Siding Type | Step-by-Step Procedures |
|---|---|
| Vinyl Siding | 1. Measure and cut the siding pieces to fit the wall. 2. Apply a bead of adhesive to the back of the siding. 3. Attach the siding to the wall using nails or screws, ensuring proper spacing. 4. Check for any gaps or unevenness. 5. Caulk any gaps. |
| Wood Siding | 1. Prepare the sheathing for the siding by ensuring it’s clean and dry. 2. Install starter strips. 3. Attach the siding boards, ensuring proper spacing and alignment. 4. Secure the siding with nails or screws, observing the correct spacing and depth. 5. Inspect for any gaps or unevenness. 6. Caulk any gaps. |
| Fiber Cement Siding | 1. Install the necessary backing and flashing. 2. Measure and cut the siding pieces to fit the wall. 3. Use screws or nails, and follow the manufacturer’s instructions for spacing and depth. 4. Inspect the installation for gaps and unevenness. 5. Caulk any gaps. |
| Metal Siding | 1. Prepare the substrate for the metal siding, ensuring it’s clean and dry. 2. Install the necessary flashing and accessories. 3. Use specialized fasteners and brackets for proper installation. 4. Secure the siding, following the manufacturer’s recommendations for spacing. 5. Inspect for any gaps or unevenness. 6. Caulk any gaps. |
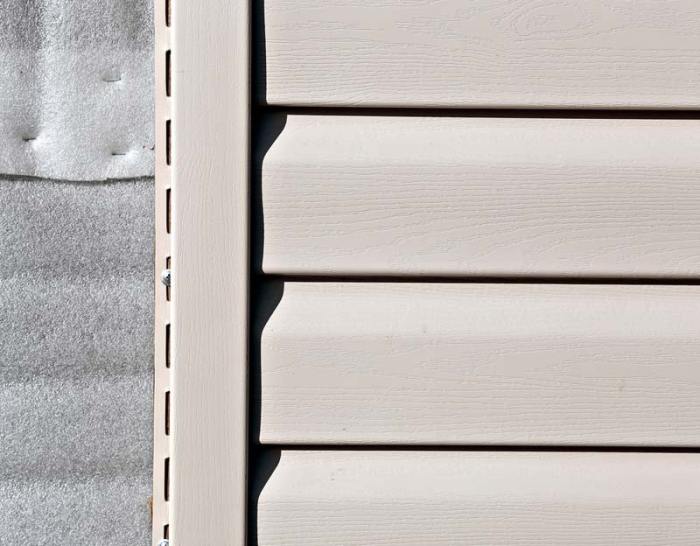
Seamless Transitions Between Siding Sections
Creating seamless transitions between different siding sections is essential for a professional finish. This often involves using appropriate flashing and trim pieces to bridge the gap between the different sections. Proper transitions are crucial to prevent water damage and maintain the aesthetic appeal of the home.
Finishing Touches and Inspection
Completing siding installation involves more than just attaching panels. Proper finishing touches are crucial for a long-lasting, aesthetically pleasing, and watertight result. Careful attention to detail in caulking, sealing, painting/staining, and quality control is essential for the overall success of the project. This final stage ensures the siding system functions as intended and enhances the curb appeal of the structure.
Thorough caulking and sealing are critical steps in preventing water damage and ensuring the siding’s longevity. These steps not only enhance the siding’s appearance but also provide crucial protection against the elements. Proper sealing prevents moisture from penetrating the structure, minimizing the risk of rot, mold, and mildew growth. Furthermore, sealing around windows, doors, and other vulnerable areas is paramount.
Importance of Caulking and Sealing, Siding Installation
Proper caulking and sealing are essential for preventing water intrusion. This is achieved by filling gaps and cracks between siding panels, trim, and other components. High-quality, waterproof caulk is recommended for optimal performance. This process ensures a continuous barrier against moisture, preventing water from seeping behind the siding and causing significant damage to the underlying structure over time. Using the appropriate sealant for the specific material of the siding is vital. For example, a sealant designed for vinyl siding might differ from one designed for wood siding.
Painting or Staining Siding
Painting or staining siding after installation is a vital step for aesthetic appeal and protection. Proper preparation is crucial before applying paint or stain. This includes cleaning the siding to remove any dust, debris, or loose materials. Priming the surface is also essential, especially for new wood siding. This step provides a better base for the paint or stain, ensuring it adheres properly and lasts longer. Choosing the right paint or stain type for the specific siding material is critical. For instance, exterior paints designed for wood siding might have different characteristics compared to paints formulated for vinyl siding. Using high-quality materials is crucial for long-term performance. Correct application techniques, such as using a brush, roller, or spray gun, should be followed to ensure an even coat and avoid drips or runs.
Quality Control Measures
Quality control is paramount throughout the entire installation process. Regular inspections during installation are necessary to ensure that each step is performed correctly. This includes checking for proper panel alignment, ensuring fasteners are correctly installed, and verifying the proper application of caulk and sealant. Post-installation inspections are equally critical. This stage involves scrutinizing the completed installation for any gaps, imperfections, or areas needing additional caulking. This meticulous approach ensures a high-quality result, protecting the homeowner’s investment and maintaining the structure’s integrity.
Best Practices for Finishing Installation
A well-executed finishing touches phase involves attention to detail and adherence to established best practices. These practices include using high-quality materials, applying caulk meticulously, and painting or staining the siding evenly. Furthermore, cleaning up the worksite thoroughly is essential to maintain a professional and organized environment. Proper disposal of materials and tools is critical for environmental responsibility.
Post-Installation Inspection Checklist
- Panel Alignment: Verify all siding panels are properly aligned and securely fastened.
- Fasteners: Ensure all fasteners are properly installed and that no panels are loose or improperly secured.
- Caulk and Sealant: Inspect all caulking and sealing applications for completeness and proper adhesion.
- Paint or Stain: Examine the painted or stained surfaces for even coverage, avoiding drips, runs, or missed areas.
- Cleanliness: Check the worksite for debris, tools, and other items, ensuring everything is properly cleaned up and disposed of.
- Water Intrusion: Inspect areas like window and door frames for any signs of water leakage.
- Structural Integrity: Verify that the siding does not exert undue stress on any structural components.
Troubleshooting and Common Issues in Siding Installation
Siding installation, while generally straightforward, can present unexpected challenges. Understanding potential problems and their solutions is crucial for a successful and aesthetically pleasing final product. Careful planning, adherence to best practices, and a proactive approach can minimize these issues and ensure a job well done.
Potential Problems During Installation
Various factors can contribute to difficulties during siding installation. Poorly prepared substrates, inadequate material selection, or improper installation techniques can lead to problems ranging from minor imperfections to major structural concerns. Recognizing these potential problems early on is key to preventing costly repairs and rework later.
Causes of Gaps and Uneven Siding
Gaps and uneven siding are common issues. These problems can stem from several sources. Incorrectly measured or cut siding panels can lead to gaps, while improper nailing or fastening can result in unevenness. Furthermore, variations in the substrate’s surface, such as uneven wall framing or insufficient preparation, can also contribute to these imperfections. Improper installation techniques and poor material quality are additional contributors.
Solutions to Common Installation Problems
Addressing gaps and unevenness requires a methodical approach. Gaps can be filled with appropriate caulk or sealant, ensuring a proper bond and a clean aesthetic. Uneven siding might necessitate adjustments to the substrate, such as shimming or leveling, before re-fastening the siding panels. In some cases, a slight adjustment in the cutting and positioning of panels can rectify the issue.
Preventive Measures to Avoid Errors
Preventing issues is always preferable to addressing them later. Thorough site preparation, precise measurements, and adhering to the manufacturer’s instructions are vital preventive measures. Using quality tools and materials, coupled with a well-defined installation plan, can significantly reduce the likelihood of problems. Regular quality checks during the installation process can also identify and correct issues before they become major problems.
Repairing or Replacing Damaged Siding Sections
Damaged siding sections often require repair or replacement. For minor damage, such as a few loose or broken panels, simple repairs using appropriate caulk or fasteners can suffice. However, extensive damage might necessitate the removal and replacement of the entire section. Carefully assess the extent of the damage and select the appropriate repair or replacement method to restore the siding to its original condition and aesthetic appeal. Using the correct materials and techniques for repair is essential for a lasting and aesthetically pleasing outcome. Always consult with professionals if the damage is substantial.
Examples of Common Issues and Solutions
- Problem: Gaps between siding panels. Solution: Carefully measure and cut panels to fit precisely. Use appropriate caulk or sealant to fill gaps and ensure a watertight seal.
- Problem: Uneven siding. Solution: Ensure the substrate is level. Use shims or adjust the fastening points to ensure even alignment. Use a level and a straight edge to check alignment.
- Problem: Damaged siding from impact or weather. Solution: Assess the damage. Minor damage may require repair using appropriate caulk, sealant, or fasteners. Major damage may necessitate replacement of the entire panel. Consult a professional for extensive damage.
Siding Installation Cost and Budget
Understanding the financial aspects of a siding project is crucial for homeowners. Accurate cost estimates allow for realistic budgeting and informed decision-making. A comprehensive approach to pricing considers various factors influencing the final cost.
The average cost of siding installation varies significantly depending on several key elements, such as the type of siding material chosen, the size of the project, and labor rates in your area. Planning a budget involves researching material costs, assessing labor expenses, and factoring in potential contingencies.
Average Cost Estimates for Different Siding Types
Various siding materials have different price points. Vinyl siding, a popular choice for its affordability and low maintenance, typically ranges from $5 to $10 per square foot for installation, including labor. Fiber cement siding, a durable and long-lasting option, generally costs more, ranging from $10 to $15 per square foot for installation. Wood siding, while aesthetically pleasing, carries a higher cost, often falling between $12 and $20 per square foot for installation, which may include additional considerations for specialized treatments. Metal siding, with its varied styles and longevity, may fall within a range of $10 to $20 per square foot. These estimates are approximate and can vary based on specific circumstances.
Factors Affecting Siding Installation Costs
Several factors influence the overall cost of siding installation. The size of the home’s exterior surface area requiring siding, the complexity of the project (e.g., challenging architectural features, multiple stories), and the need for additional work (like window and door replacements) all contribute to the total expense. Furthermore, labor rates in different geographic locations and the availability of skilled installers will affect the cost.
Tips for Creating a Realistic Budget
Creating a realistic budget involves meticulous planning. Firstly, obtain detailed estimates from several reputable siding contractors. Compare their quotes, focusing on transparency and detailed breakdowns of costs. Consider obtaining multiple quotes to ensure fair pricing and verify any discrepancies. Next, factor in potential additional expenses, such as permits, debris removal, and any necessary repairs or preparations. Contingency planning for unforeseen circumstances is also essential to manage unexpected costs effectively.
Comparison of Siding Installation Methods
Different installation methods can affect the cost of the project. Traditional methods, often involving fastening siding directly to the existing structure, may have a lower initial cost but might require additional preparatory work or have higher material costs. Alternatively, using specialized installation techniques might enhance the project’s durability but could lead to a higher initial price tag. In any case, comparing quotes from contractors specializing in different methods will help in making an informed decision.
Estimated Costs Table
This table provides a general overview of estimated costs based on material type and project size. Remember that these are approximate figures, and actual costs may vary.
| Siding Material | Project Size (sq ft) | Estimated Cost (USD) |
|---|---|---|
| Vinyl | 100 | $500 – $1000 |
| Vinyl | 500 | $2500 – $5000 |
| Fiber Cement | 100 | $1000 – $1500 |
| Fiber Cement | 500 | $5000 – $7500 |
| Wood | 100 | $1200 – $2000 |
| Wood | 500 | $6000 – $10000 |
Safety Considerations During Siding Installation
Ensuring a safe working environment is paramount during siding installation. Proper safety precautions protect both the installer and those around the worksite. Neglecting safety measures can lead to serious injuries, costly delays, and potential legal issues. A proactive approach to safety throughout the entire process is crucial.
Thorough adherence to safety protocols and the consistent use of appropriate safety equipment are fundamental to a successful and accident-free installation. This includes understanding and implementing best practices for working at heights, handling tools and materials, and recognizing potential hazards. By prioritizing safety, you can minimize risks and ensure a positive outcome for all parties involved.
Importance of Safety Gear
Appropriate safety equipment significantly reduces the risk of accidents during siding installation. Personal Protective Equipment (PPE) is essential for protecting against potential hazards. This includes more than just safety glasses and gloves. Understanding the specific risks associated with the job site and selecting the correct gear is critical.
- Safety harnesses and fall protection systems are critical when working at heights. These systems help prevent falls, which are a major concern in siding installation. Using a properly fitted and inspected harness is paramount to personal safety. The harness should be secured to a sturdy anchor point.
- Safety glasses, or goggles, protect the eyes from flying debris, dust, and other potential hazards. Impact-resistant safety glasses are highly recommended to prevent eye injuries.
- Work gloves provide protection for hands when handling tools and materials. Selecting gloves appropriate for the task and conditions (e.g., heavy-duty gloves for handling nails or sharp objects) is essential.
- Hard hats protect the head from falling objects and impacts. Hard hats should be worn whenever there’s a risk of head injury.
Proper Handling of Tools and Materials
Safe handling of tools and materials prevents accidents and injuries. A systematic approach to handling tools and materials is crucial to ensure efficiency and safety. Incorrect handling can lead to accidents.
- Tools should be inspected before each use to ensure they are in good working order and free from defects. Damage or wear can lead to malfunctions and accidents. Tools should be stored properly after use to avoid injury and prevent damage.
- Materials should be handled carefully to prevent slips, trips, and falls. Heavy materials should be moved with appropriate lifting techniques and equipment. Ladders, scaffolds, and other lifting aids should be used correctly and inspected regularly.
- Always follow the manufacturer’s instructions for using tools and handling materials. Proper technique and procedure are vital for safe handling and use. This includes understanding the tool’s capabilities and limitations.
Working at Heights
Working at heights poses significant risks in siding installation. Safe practices are crucial to minimize these risks. This includes careful planning, proper equipment, and regular checks.
- Employing a designated spotter or assistant can greatly enhance safety when working at heights. This reduces the risk of falls and helps maintain balance. A spotter should be knowledgeable in safety procedures and trained to assist in emergencies.
- Regular inspections of ladders, scaffolding, and other equipment are essential. Ensuring the equipment is in sound condition is critical for preventing accidents.
- Avoid overloading equipment or attempting to use equipment beyond its designed capacity. This prevents structural failure and accidents.
- Proper securing of the work area is critical. This includes ensuring the work area is clear of obstructions and debris.
Safety Precautions During Installation
Following safety precautions throughout the installation process is vital. These precautions should be integrated into every step of the project. Adhering to these safety guidelines will minimize the risks associated with siding installation.
- Always use proper lifting techniques to prevent injuries. This is particularly important when handling heavy materials or tools.
- Use appropriate safety equipment and PPE when working at heights or in hazardous environments. These precautions help prevent injuries.
- Maintain a clear and organized workspace to minimize tripping hazards and ensure safe movement. An organized workspace reduces the risk of accidents.
- Keep tools and materials secured to prevent them from falling or shifting during work. This helps prevent accidents.
- Never work alone when working at heights or in hazardous environments. Always have a backup to assist in case of emergency.
Final Thoughts
In conclusion, this guide provides a thorough overview of siding installation, covering everything from initial planning to final inspection. We’ve explored the critical steps involved, from selecting the right materials and tools to ensuring a safe and efficient installation process. Remember that meticulous planning, proper techniques, and adherence to safety protocols are crucial for a successful and long-lasting result. Ultimately, a well-executed siding installation not only improves your home’s aesthetic appeal but also significantly enhances its value and longevity.